


Note: This App needs Root Access. and i'm not responsible for anything went wrong on your device. This method works fine for me. So do as i said.
First you need Font Changer app. Download it from market.
After Installed this app you will see this screen.

The above screenshot shows there is no custom fonts to display in this panel. Which means we are not yet added any font in FontChanger directory/folder.
How to Add Fonts in FontChanger folder?
1) Download your desired font(s) from any site you wish. (I suggest 1001FreeFonts. The fonts are categorized and Good types.)
Note: The Font type Should be in TrueType Font (.ttf)
2) Now place the downloaded Fonts to ' .fontchanger ' This folder is located in SDCard. Use some file explorer like ES File Explorer or Root Explorer. Since this folder is not view able in 'MyFiles'. Use File Explorers as i mentioned before.

3) Once you placed the font in .fontchanger folder it should be look like this.
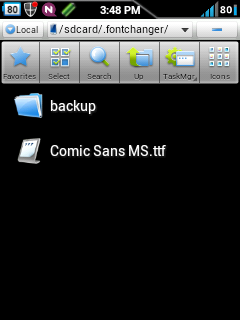
4) Now open the Font Changer app. You can see the added font in font list of Font Changer App.

5) Now tap the font and apply it and follow the below steps,

6) After installing it. Reboot your device as it prompt the action of Reboot.

7) Thats all now your device is perfect with your custom font.

Enjoy and Peace!!!!


