Wednesday, 29 August 2012

SD-Booster (ROOT)

SD-Booster (ROOT)

SD-Booster speeds up your
external and internal SD-Card(s)
(external and internal memory)
up to 40 times! Enjoy a new
feeling of speed on your Android
smartphone anytime and
everywhere you are.
Starting apps, listing to your
favorite music or just swapping
data with your PC ? Whatever
you do, the SD-Booster improve
your phone speed!
SD-Booster needs root
permission to run, otherwise SD-
Booster can't do anything!

Features:
-MMC detection framework to support
any SD-Card
-Speedup every external and internal
SD-Card
-Set on Boot
-Color based suggestion terms of
current cache size

PLEASE don't move SD-Booster to
your SD-Card, otherwise SD-Booster
doesn't work on boot!

Download from- "Android Market"


For any questions and answers go In this site-- http://www.homerchess.com/sd-booster/SD-Booster-v1-eng.html
Read More

Saturday, 18 August 2012

Root Explorer Pro v2.20

Root Explorer Pro V2.20

Best Explorer Ever and a must installed application for a ROOT user.

Root Explorer is the ultimate file manager for root users. Access the whole of android's file system (including the elusive data folder!).

Features


1) SQLite database viewer,
2) Text Editor,
3) create and extract zip or tar/gzip files,
4) extract rar archives,
5) multi-select,
6) execute scripts,
7) search,
8) remount,
9) permissions,
10) bookmarks,
11) send files (via email, bluetooth etc),
12) image thumbnails,
13) APK binary XML viewer,
14) change file owner/group,
15) create symbolic link,
16) "Open With" facility,
17) MD5,
18) create shortcuts.

Here the download Link


Read More

Tuesday, 7 August 2012

Auto Killer Memory Optimizer Pro (ROOT)


Auto killer pro is like a god gifted application for android root users.This is a application come with a super power.
Main works:-
1. This little app. has a power to speed up your android device.
2. Increase battery life.
3. Speed up reading of sd card.
4. Speed up reboot time.
5. Increase ram.
6. Kill unnecessary apps and many more things like that...

It is a award winning tweaker.

Here the LINK.
Read More

Tuesday, 17 July 2012

Titanium Backup [Root] [A Complete Guide] [Tutorial]


Since i joined in Android family, i was hearing this "Backup your apps with Titanium Backup"... And i must admit it, at first i thought myself that "What the Heck is Titanium backup anyway?? and how can i take apps backup through it?? and what's special in Titanium backup than others??" Later i found that this App is Best in standard... It is the best... 

What is Titanium Backup?

Titanium Backup is an Ultimate app which is used to Backup your Entire Android phone, then Restore the Backup data... UnInstall the System apps and bloatware... And so much to do with it...

Features

  1. Backup
  2. Restore
  3. Move/Integrate
  4. Freeze/Defrost
  5. Manipulate
  6. Un-Install

Features Explained

  1. Backup - Backup all System and User Apps with settings and Data of Apps
  2.    - Backup all user apps
       - Backup all system data
       - Backup all user apps + system data
       - Backup new user apps and newer versions
       - Backup new user apps + system apps and Newer apps
  3. Restore - Restore the Backup apps
  4.    - Restore missing apps with data
       - Restore all system data
       - Restore missing apps + all system data
       - Restore newer versions of user apps
       - Restore all apps with data
  5. Move/Integrate - Move/Integrate All apps to SD Card
  6.    - Move user apps to SD Card
       - Move user apps to internal memory
       - Integrate updates of system apps into ROM
  7. Freeze/Defrost - Freeze/Defrost all running apps
  8.    - Freeze all user and system apps
       - Defrost all user and system apps
       - Power defrost all user and system apps
  9. Manipulate - Clear cache and Wipe data of all System and User apps
  10.    - Clear cache for user and system apps
       - Wipe data for user and system apps
  11. Un-Install - Un-Install any System and User apps without any problem
  12.    - Un-Install backed up user apps
       - Un-Install non backed up user apps
       - Un-Install all user apps
       - Un-Install all user and system apps
*Note: All the sub features are self explanatory...

Download


How to Backup of your Apps?

This is the opening screen when you launch the Titanium backup
Tap the menu and click on "Batch"...
Click on whichever feature you want, Backup user apps or Backup system apps... For this tutorial i choose "Backup user apps"
Now this is the screen which you see when you launch "Backup all user apps"... You will see four options in here 1) Run, 2) Select all, 3) Deselect all and 4) Invert selection... Now select which apps you want to backup or select all apps to backup... After selection, tap "Run"..
Backing up the apps...
Confirmation message for backed up apps on notification bar...
Thats all you have successfully backup the apps... This process is same for other options like Restore, Manipulate and Un-Install the user apps and system apps...

Note: The backed up apps are stored in the folder "TitaniumBackup" in SD Card... If you want to copy it to somewhere i suggest you to copy the whole folder...

If you have any doubts about Titanium Backup, drop a comment... I will try to help asap...

Warning: For all blog authors... If you wish to put this tutorial on your blog, ifs free to copy under Creative Commons Attribute... Without a proper credit, the post which you copy from here is condemned...

Enjoy and Peace!!!
Read More

Friday, 24 February 2012

Font Changer (How to change the device Font) [Tutorial] [Root]

One of the best feature in Android is you can change everything like themes, fonts and the complete look of your device. This App lets you can change boring stock fonts to something that attracts you and your friends.


Note: This App needs Root Access. and i'm not responsible for anything went wrong on your device. This method works fine for me. So do as i said.

First you need Font Changer app. Download it from market.


After Installed this app you will see this screen.


The above screenshot shows there is no custom fonts to display in this panel. Which means we are not yet added any font in FontChanger directory/folder.

How to Add Fonts in FontChanger folder?

1) Download your desired font(s) from any site you wish. (I suggest 1001FreeFonts. The fonts are categorized and Good types.)
Note: The Font type Should be in TrueType Font (.ttf)
2) Now place the downloaded Fonts to ' .fontchanger ' This folder is located in SDCard. Use some file explorer like ES File Explorer or Root Explorer. Since this folder is not view able in 'MyFiles'. Use File Explorers as i mentioned before.


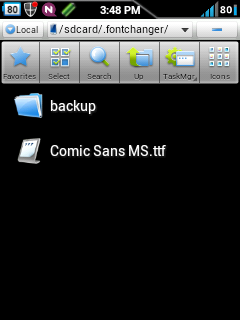
3) Once you placed the font in .fontchanger folder it should be look like this.


4) Now open the Font Changer app. You can see the added font in font list of Font Changer App.


5) Now tap the font and apply it and follow the below steps,


6) After installing it. Reboot your device as it prompt the action of Reboot.


7) Thats all now your device is perfect with your custom font.


Enjoy and Peace!!!!
Read More

Thursday, 23 February 2012

AdFree [Block annoying Ads] [Root]


Ever since im using Android free Apps. I got annoyed by only one thing. its Ads. Its really annoying for me. Whenever i open the App, the app loads the Ads. Its not only cover my screen but also took my bandwidth. I know its a revenue to the app developer but still its annoying. So here is the solution for an Ad Free android app.

Screen Shot


Note: This app needs Root permission.

Download AdFree app from market. And the App works the rest. its free and you don't need to do anything.


Enjoy and Peace!!!!
Read More

Saturday, 11 February 2012

Adobe Flash Player v11 ARMv6 [Root]

Hello Everyone. Since i joined in some Galaxy Y Forums and Groups. I found one of the Hot topic is Adobe Flash Player. Everyone wants to see Youtube Videos or TV Shows or anyother Flash content in their Galaxy Y. Most of them were disappointed because they couldn't get the solution. After a long Research on Google. I found a solution for the Problem. Lets take a look at it.


Waring: This procedure only works on Rooted Device and in a Specific Browser.

Steps to Install


1) Download Adobe Flash Player v11.0.1.153 armv6 from here Download
2)Download UC Browser from here Download
3) Now Install Adobe Flash Player 11.
4) Install UC Browser. (Needed)
5) Restart the Phone. (Needed)
[Note: As far as me i personally tested. It is working on Default Browser and in UC Browser.]

That's all you Installed 100% working Adobe Flash Player.

Enjoy and Peace!!!!
Read More